Episode 1 – What is Design Thinking?

Episode 1 – What is Design Thinking?
In this episode, you will hear what design thinking is and how students react to this approach from Min Cho, a teacher and expert in global health and international development at Leiden University College and from Nadia Teunissen an expert in design thinking and a teacher. Together with Annie Trevenen-Jones and Elise van der Steen they developed the class “Design for the Future: Wicked Environmental Problems in Sustainability and Health”.
In this article, you will find additional information and resources to get started with yourself. Download the transcript.
Subscribe and listen on: Apple Podcasts or Spotify
What is design thinking?
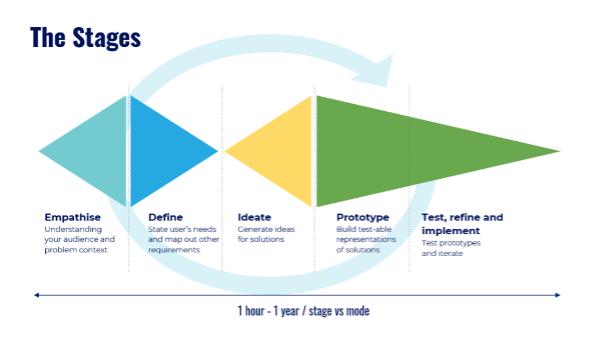
Nadia explains design thinking as a process for creative problem solving. This method is widely used by designers to design new products or experiences (for example, VR experiences to help children overcome anxiety of needles but also for what kind of content should be featured on the teaching support website). There are usually five stages complete multiple times (see the image below). Design thinking is an iterative process. In each stage you learn new things about the target group or your solution. You keep building on those insights and go back and forth between the stages. Here is a summary of each stage:
- Empathise: by trying to find out what is going on with the target group through interviews or by shadowing. Eg: What problems do people with diabetes experience around medical waste? What causes those problems? How do they feel about those problems? Why is it important to them that this problem is solved? By talking to the target audience and empathising with them students get an understanding of what the problem is and what is important to consider when solving the problem.
- Define: based on the insights from stage 1 about the needs of the target group, the students will design a problem statement. The problem statement is included in the design brief and is based on a ‘how might we’ question is formulated. This question will guide the students in their project. The trick is to give a clear and narrow enough question that provides guidance but not too narrow that it does not leave room for creativity.
- Ideate: in this phase, the students will brainstorm possible solutions. They try to gather as many ideas as possible and will work out some of them in the next phase. Read more about the importance of divergent and convergent thinking below.
- Prototype: in this phase, students create different prototypes to learn what works and what does not. A prototype must be quick, easy and cheap to carry out. For example, if the goal is to create an informative brochure, students can create three simple mock-ups in Word, instead of one fancy graphically designed one. Or, if the idea is to give a workshop, presenting the goals and agenda of the workshop can already be enough to get the necessary feedback.
- Test: here the students go back to the target group with their solution to see what their reaction is. New insights and areas for improvement will emerge here, which will give valuable insight into what works and what does not. After the testing stage students will adapt their idea and go through (part of) the cycle again.In this case the students pitched their ideas to different stakeholders at the end of the course.
Convergent and divergent thinking
In this episode, Min and Nadia talk about the importance of convergent and divergent thinking. In a brainstorm you try to generate as many ideas as possible. You want to create as many options as possible, this is divergent thinking. Convergent thinking is the process of filtering and making choices. This process is repeated multiple times in various stages of the process. As a teacher it is your job to keep an eye out for situations that benefit divergent or convergent thinking. Do groups keep coming up with new ideas, then it might be time to start converging? Or, have they fallen in love with the first idea they had? This might indicate that some divergent thinking might benefit the process.
Tips for divergent thinking:
- Wild and crazy ideas – tell students that all ideas are welcome, even the most unlikely once. These might not be possible but can trigger a new idea which will be possible.
- Wait for feedback – when someone offers an idea the rest is allowed to ADD to the idea but not critique this idea. The phrase “yes but” is replaced with “yes and”. This does not mean that all these ideas will be executed. Later in the process the feasibility check comes in.
- Combining ideas – when you combine two ideas or principles you might get a useful new idea.
To challenge students to think creatively Nadia and Min let them brainstorm as many ways as possible that you can use an orange. Another way to come up with wild and crazy ideas you can use the ‘crazy 8’ format, find it below under creativity exercises.
Tips for convergent thinking:
- Cluster, reflect, choose – to get students in the right mindset for making choices and reducing the number of options you can follow a few steps. Start by clustering similar ideas, give this group of ideas a name to represent the cluster. Reflect on the pros and cons of each cluster. Choices are made either by asking the problem owner to make a choice or by something called ‘dot voting’ where students each get three votes to distribute on their favourite ideas.
To cluster and reflect you can use the ‘now-how-wow’ canvas, which checks for how feasible and desirable the idea is. Important in choosing is that team feels energy to get started right away!
Design brief
In this episode the design brief is shortly discussed. A design brief is a summary of your findings in the empathy phase. It can help you give focus on what it is that you are trying to solve. It is also a living document that should be updated every time you learn something new about your target audience.
In this course the students were given several personas to choose from, based on this information and guiding questions they were asked to interview their target audience and find out more. The starting description and guiding questions looked like this. Students were encouraged to keep track of their findings in the design brief.
example of a design brief
Jennifer is an 18-year-old student who is keen on sustainability issues. She is conscious of waste separation and recycling. Jennifer takes several vitamins. She also has a prescription for her acne. She also takes birth control medication. She lives in a dormitory setting and at times is unsure about the different waste categories and wants to find out more. She is often unsure where to dispose of the unused medications (eg, acne medication, liquid gels and oral pills) that she has. Does the unused medication go into general waste? Does she return to the pharmacy? Does she separate the liquid gel from the bottle and throw away the bottle separately?
Jennifer has inquired about opportunities to do more and expand her knowledge about sustainability and waste issues.
- What is the sustainability challenge (eg household hazardous waste problem) context?
- Who does the user collaborate with (frequently and less frequently)?
- How does the user like to be recognised when it comes to sustainability behaviour?
- What types of sustainability behaviour opportunities are valuable and desired from the user’s perspective?
- What are some of the pain points (challenges) the user faces when it comes to waste disposal?
Here you can find a template to create your own design brief (in Dutch).
Creativity exercises
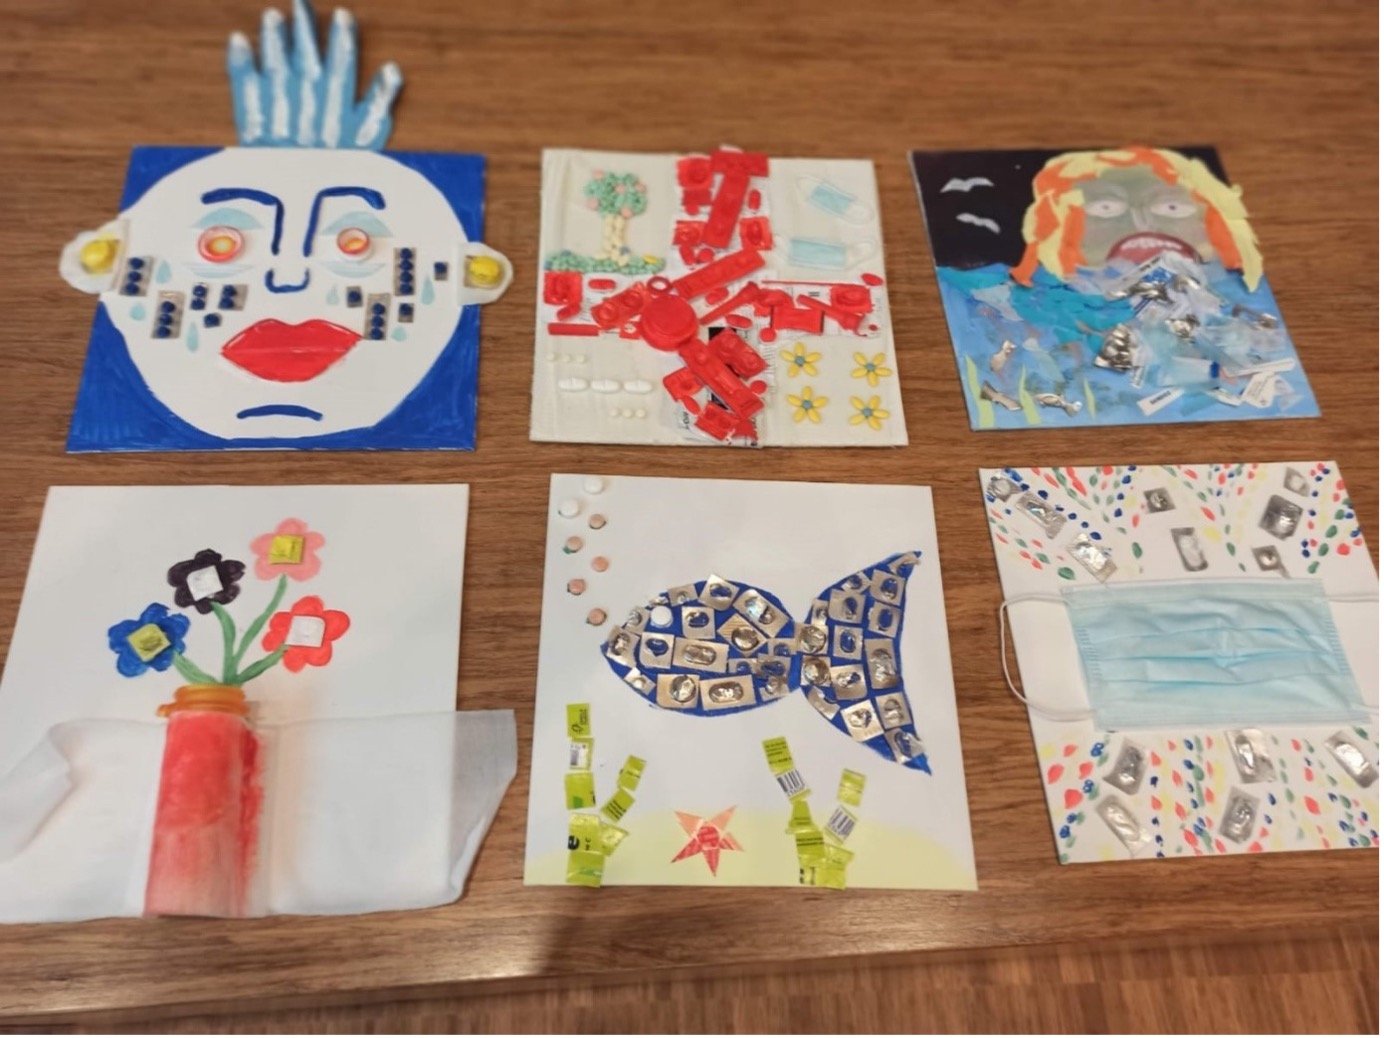
In this episode, Nadia and Min talk about creativity exercises to stimulate students to explore the uncomfortable and unknown and make them more familiar to experiment and be okay with ‘failure’. In this course students got really creative in their end projects and came up with a ‘art waste workshop’ where people were invited to create an artwork using their waste. You can see the results in this picture”
To stimulate creativity you can use short exercises that get students familiar with dealing with uncertainty and trusting the process, whether it is the scientific process of the design thinking process. Two examples are: the Crazy 8’s to generate ideas and what can you do with an orange to think outside of the box.
- How can you use an orange?
- Build a house from materials in your house
- Draw each other without looking at each other’s faces
Try your own Crazy 8’s to generate ideas
Brainstorming exercises
What can you do with an orange?
Shared by Nadia Teunissen
Goal: Prepare for a divergent phase in design thinking to train your brain to associate freely and think without restrictions.
- Set a timer for 2 minutes and write down all the things you could do with an orange as fast as you can. Try to come up with at least 10 different ideas (individually on a shared online whiteboard or a post-it wall)
- Cluster your findings as a group (5 minutes)
- Reflect on the added value and feasibility of each cluster (5 minutes)
- Vote and pick a favourite idea.


Share your experiences
Are you experimenting with design thinking and do you want to share your story? Do you want to start experimenting and need help getting started?
Please contact d.bosch@sea.leidenuniv.nl